Remember that vanity bench that I bought a few weeks ago? Well I finally was able to work on it this Sunday. There was no wind and it was 97F (36C) so it would dry up quickly. This was the first time I have ever redone a cushion. I need to practice my corners but it went ok for a first timer.
Here's what it looked when I bought it. Ugly print, nice legs but a bit worn. I first tackled the seat. Oh boy did this seat surprised me! I could of done the lazy way of just putting a new fabric down and call it a day. People who know me, would know I wouldn't do that. Off with that fabric!
Here's what it looked when I bought it. Ugly print, nice legs but a bit worn. I first tackled the seat. Oh boy did this seat surprised me! I could of done the lazy way of just putting a new fabric down and call it a day. People who know me, would know I wouldn't do that. Off with that fabric!


So I take out that paisley fabric and what do I see? Another fabric! Looks like someone else had the same idea as I did but did it the easy way. It look dirty and dusty. Off it went!


So you would think, finally, it's done! Nope! There was ANOTHER fabric on it. WTH? This was must be original since it was dry at the bottom and sides but soooo dirty and dusty at the top. I had to continue my work outside since it left a trail of dust on my floor. Oh heck no! After a quick swipe of my Lysol wipe, I went outside in the blazing sun. Finally I got that fabric and disgusting padding out. Ewww!


A quick sanding, cleaning and it was ready for some paint.

What did I use? Rust-oleum Black Lacquer. I wanted it to be shiny and this does the trick. Two coats and it looks updated.

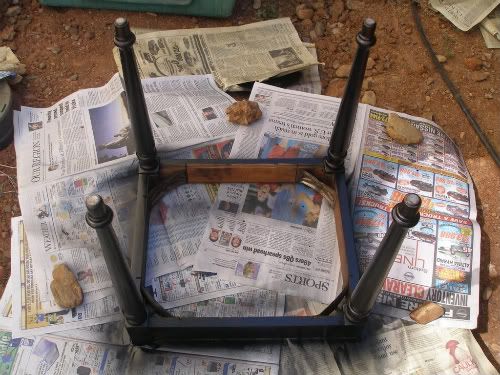

Here's what it looks now. I think it looks better but that's just me. My first head to toe project. It was fun even under that hot sun. Can't wait to try on something else!


Now since I have your ears right now, can you guys give me some idea as to what kind of window treatments should I get for my master bathroom? I don't like lacey or frilly curtains. The white blinds stays since I don't want to flash my neighbors. I don't want to seem "too" friendly. Any suggestions? Merci!


A bientot!


1 comments:
wow, i've been learning so much about spray painting and upholstery. Thank you so much!! Merci!!
Post a Comment